You can enable SSL for the domains under your VPS hosting order by enabling the AutoSSL option. Auto SSL will automatically install domain-validated SSL certificates for the Apache, Dovecot, and Exim services on your user's domains. You can also review the logs and selectively enable or disable Auto SSL for users.
Follow the steps below to enable or disable Auto SSL:
Step 1: Login to WHM panel.
Step 2: Navigate to the Accounts Function section.
Search for AutoSSL in the search bar and under SSL/TLS section, click Manage AutoSSL.
Step 3: Choose SSL Provider.
Under the Providers tab, select the SSL provider and click Save. 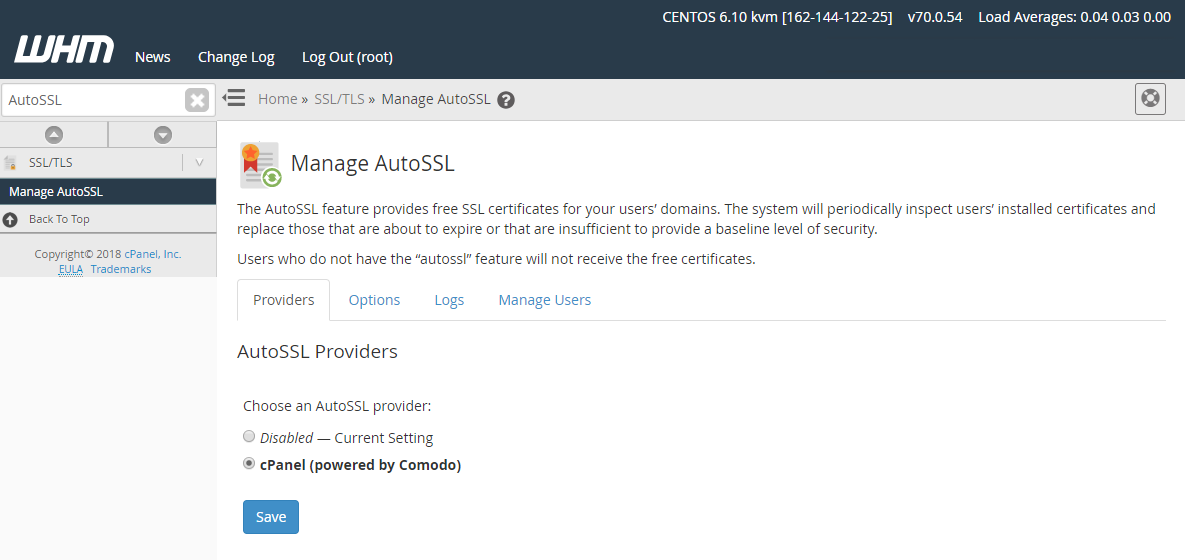
Step 4: Manage Auto SSL.
i. Enable SSL
You must use a package that includes the autossl feature in order to receive the free certificates.
- Search for the user and select the check box, you can also select multiple users and enable the feature.
- Click Enable AutoSSL on selected users.
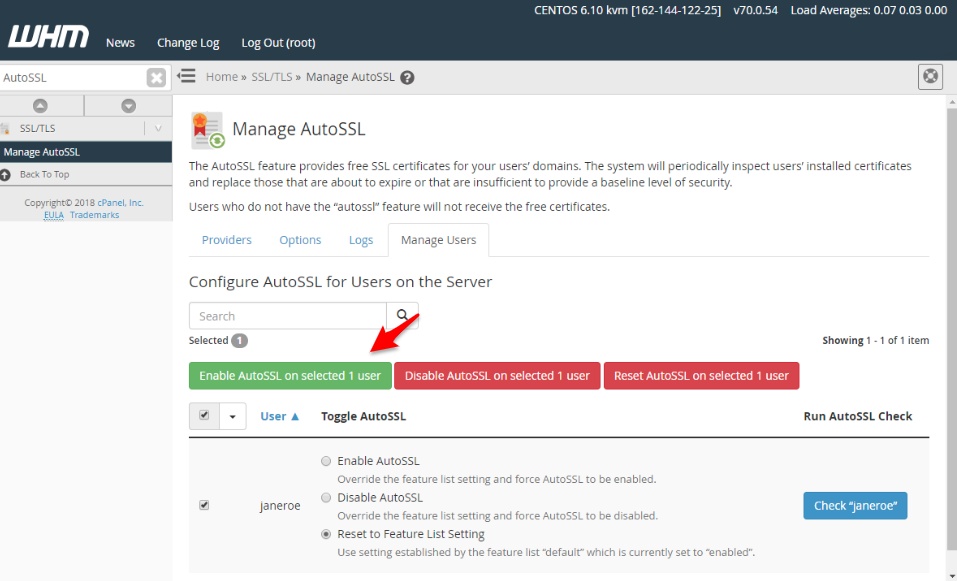
This will enable AutoSSL for all the selected users which have the AutoSSL feature in the package assigned to them.
ii. Disable SSL
You can also force to disable the AutoSSL for a particular user.
- Search for the user and select the check box, you can also select multiple users and disable the feature.
- Click Disable Auto SSL on selected users.
